SWINDLER EFFECTS
  • Home
  • Store
    • Coming Soon
    • Legacy
  • Dealers
  • Warranty
  • FAQ
    • Documentation >
      • Legacy
  • Contact
  • About

MAC Firmware Update Instructions

  • The micro USB port on the RED MOUNTAIN / THE GULF (V2) is located INSIDE the enclosure. You will have to remove the back plate to access it.
​
  • The micro USB port on the NEXUS_4 (V2) is easily accessed through a hole in the right side of the enclosure.

  • Download the “SWINDLER.dmg” disk image below.​
  • This file is kept up to date and includes ALL firmware releases for ALL pedals to date.
SWINDLER.dmg
File Size: 44548 kb
File Type: dmg
Download File

  • Double click the disk image you just downloaded. Should be in your downloads folder. 

  • Copy the “SWINDLER” folder from the disk image somewhere on your computer. Suggest the desktop for easy access. Once this is done you can eject the mounted disk image and delete the “SWINDLER.dmg” file.
​
  • Open the “SWINDLER” folder and you should see the contents below.
Picture
  • If this is your first time trying to update the firmware then you’ll need to double-click the “CrossPack-AVR.pkg” first. Just follow the installer. This will install some background libraries and drivers needed to run the code. This only needs to be done once.

  • If the previous step is done, double click the “SWINDLER_FIRMWARE_UPDATE_APP” and simply follow the on-screen popup instructions that appear. Details below if needed.

  • If done correctly,  a “Programming COMPLETE!” window will appear and your pedal should be running the firmware you selected.

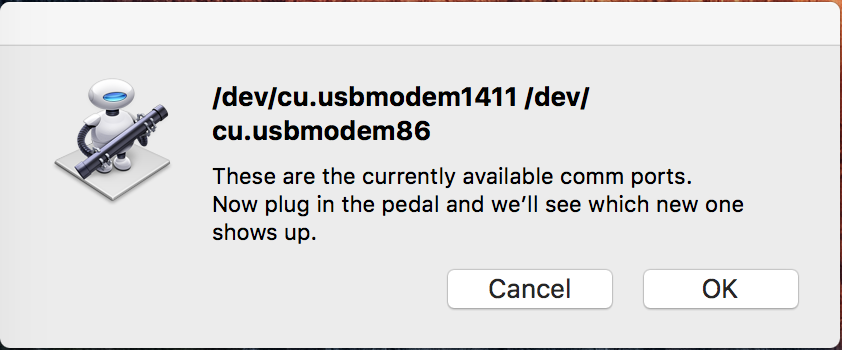
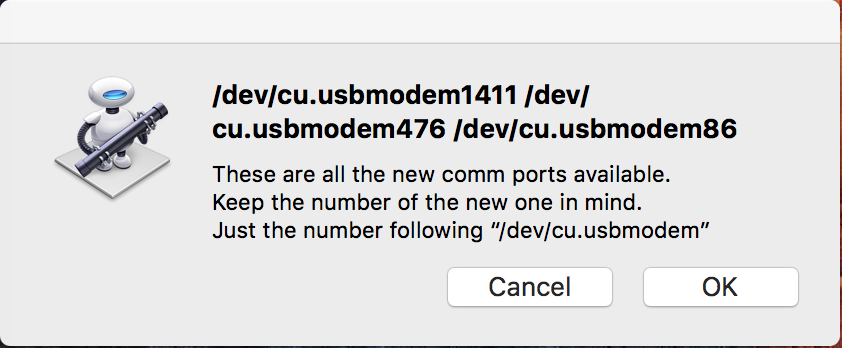
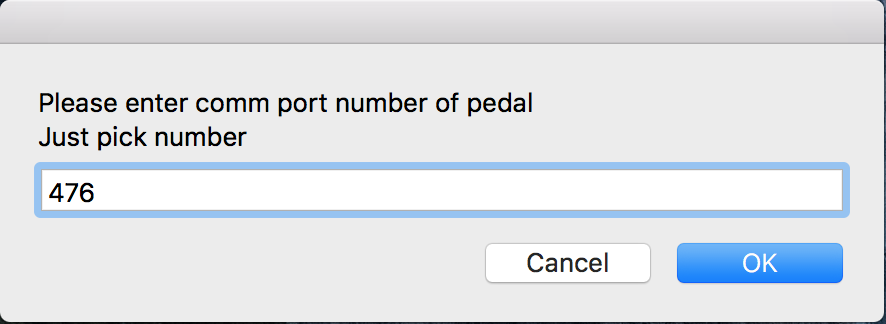
Application Walkthrough

  • Step 1: Ensure pedal is NOT connected with Micro-USB cable (not provided) and click “OK”.

  • Step 2: On this screen you will select the firmware you wish to upload. These are organized in pedal specific folders in the “SWINDLER” folder from the disk image you downloaded originally. Navigate to the pedal specific folder, click the firmware you wish to upload, and click “Choose”. Firmware with higher “VER_X” numbers are newer. 
​
  • Step 3: On this screen you will see all the USB connections currently active on your computer. In the example below you can see ports “1411” and “86” are in use. If nothing is connected to your computer you may not see anything listed. NOW plug in the pedal and click “OK”.
Picture
  • Step 4: On this screen you again see all the USB connections active on your computer. Since you plugged in the pedal before hitting “OK” in the previous step, there should be a new port listed. In the example below, the new port is “476”. Determine which number is new on your computer and just remember the NUMBER. Then click “OK”. 
Picture
  • Step 5: On this screen simply type in the new USB port number from the previous step and click “OK”. 
Picture
  • THAT’S IT! If done correctly your pedal should now be running the firmware you selected.

IF ANY PART OF THE ABOVE INSTRUCTIONS WAS CONFUSING, PLEASE REACH OUT THROUGH THE CONTACT FORM AND WE'LL BE GLAD TO HELP.

Want to be the first to know cool things?

  • Home
  • Store
    • Coming Soon
    • Legacy
  • Dealers
  • Warranty
  • FAQ
    • Documentation >
      • Legacy
  • Contact
  • About